.

Showing posts with label diy. Show all posts

[ totally wired ]

WITH ALL THE hustle and bustle around here with gifts and wrapping and card writing, I need to reorganize a bit (ok, more than a bit - it's a disaster!). I've always been fond of wire baskets and I love how every one of these little office spaces incorporates wire baskets. Much more charming than those cheap plastic office organizers!


Cute wire baskets aren't always easy to find so if you want to try your hand at transforming an old freezer organizing basket from white plastic-coated to something a bit more chic, you have to see what Tina did at Rubies' Place!

lisa


[1, 3, 4 little emma english home; country homes & interiors; cath kidston; rubies' place]

[ hey cutie ]


JUST A BIT of holiday cuteness with donuts! Perfect with hot chocolate after a fun afternoon.

lisa
[via creativeholidaygiftideas]

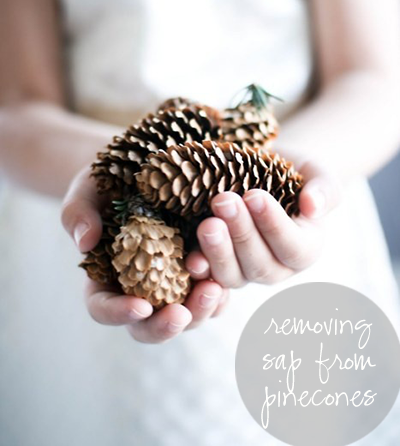
[ removing sap from pinecones ]

IT'S THAT time of year when pinecones take centre stage in holiday decorating. Buying pinecones can be expensive but if you're lucky enough to live somewhere where you can gather them on a walk near the woods, you can easily prepare them for crafting. I had some that I brought back from Canada since finding them in Dubai isn't an easy thing.

But first: remove the sap…


There are a couple of ways you can remove the sticky sap from pinecones: washing them or baking them. I decided to bake them since I figured it would be quicker and much less messy. It worked like a charm.

Line a baking sheet with foil and lay out the pinecones…


Bake in a 200F oven for about 30 minutes or so. Check on them every so often to make sure they're doing ok. Turn them if you like. The sap will drip off onto the foil as the pinecones dry and open up. Your whole house will smell like pine trees while they bake…


Remove from oven and lift them from the foil. Notice how they've opened up and the melted sap has created a lovely hard shine on the tips…


Now they're ready for your decor either au natural or you can add paint or glitter…


Are you decorating with pinecones this Christmas? 

lisa
[first pic: via marloes oosterhuis; remaining: mine]

[ homemade chalk paint console makeover ]

REMEMBER THIS console we shipped here from Muskoka?


Well, I've been meaning to give it a facelift for a while now and was really excited to hear about Annie Sloan's Chalk Paint {partly because the results are always so pretty, and because you don't need to sand or prime first - I'm lazy}.

Well, my excitement fizzled when I discovered that no one in Dubai carries it and no one will ship it to me here either. :(

Plan B: homemade chalk paint


I stumbled upon a couple of suggestions on how to make your own so I thought I'd give it a try.

I had some pretty Duck Egg paint from Laura Ashley and decided to use that {eggshell finish} 1/2 cup and mixed it with 1 tbsp of Plaster of Paris.


The best part is chalk paint requires no prep ~  just start painting.


I chose to do 2 coats. The paint dries fairly quickly.


Once the second coat had dried for a couple of hours, I distressed the edges a bit with some coarse sandpaper.


I wiped it clean to remove all sanding dust and then it was time to wax.

I chose Lundmark Clear Paste Wax. Why? Because that's all I could find in Dubai. I was hoping it would be as lovely and soft to work with as Annie Sloan's Wax is supposed to be.


This wax was awesome! I applied it with an old cotton sport sock on my hand and it went on smoothly in a nice thin coat. After about 10 minutes of drying time, I buffed it with a clean sock.


Some new knobs to add some sparkle.


All done! Can you see the lovely sheen the wax gave it?


You can add a coat of a brown wax over top if you want to add a bit more age. Since I couldn't find anything other than my clear wax, I left it as is.


I'm so pleased with how it turned out. The homemade chalk paint worked like a charm and was so cheap. My favourite part was the waxing - it was quick and it gave the perfect sheen.

Now what else can I paint?

lisa


[ my simple snow white wreath ]

YOU MAY have seen this style of wreath before but I thought I'd share my version I whipped up yesterday. So super easy and the supply list is short: a wire hanger and fabric! {a lifesaver since finding crafting supplies isn't easy in Dubai}.


You can use any fabric you have on hand or whatever you find on sale. {I used an extra curtain panel I had picked up on clearance at Pottery Barn. It ended up being about 2 yards of 54" wide fabric}. I washed my fabric to soften it and did not iron it {wrinkles help make it look cuter}.

Measure out 4" wide increments and tear into strips.


Untwist your hanger and form into a circle shape.

Then start poking the hanger through the strips of fabric, folding like an accordion as you go {I spaced my pokes about 2" apart}.


When you've poked it all through, use some pliers to form a loop at one end of the hanger.


Push all the fabric towards the loop and feed the other end of the hanger through the loop.

Snip the hanger and form a loop so that the ends interlock. I positioned the loops on the side of the wreath and adjusted the fabric to hide them.


Use a scrap of the same fabric to create a loop for hanging by tying it to the hanger between the folds.

Give the fabric folds a bit of a twist to create fullness and make them look more random.

And voila!


You can stop here if you like, or add a ribbon, or decorate it anyway that you'd like.

I chose to hang an ornament in the center for Christmas...


I simply pinned the jute string to the back of the wreath for easy removal later.


I love the simplicity of it and think it looks pretty against a pale wall or the dark wood of our entrance door. And once Christmas is over, off comes the ornament and I'll hang it in my bedroom.

Happy wreathing!

lisa


[ free amy butler holiday patterns ]

LOOKING TO do a bit of crafting before the holidays? Then head on over to Amy Butler to download some free pdf patterns!

Here's a sampling but there are others too!


Happy crafting!

lisa

[ handmade cards ]

I LOVE the idea of handmade cards {though I've usually sent out store-bought mostly due to timing and laziness}. But I love that handmade cards allow you to personalize them however you want and make as many as you need at a fraction of the price.

Last year I decided to make some simply ones using my Silhouette {see them here}. This year, I took a different approach and simply used my computer…


I won't pretend that I designed these cute graphics myself ~ I could have but decided to speed up the process a bit and found the LOVE graphic on Pinterest as a downloadable tag freebie {do a search on Pinterest for all sorts of freebies}. Instead of using it as a tag, I thought it would be cute modified into a card so I simply printed off a bunch on a page and trimmed them out…


I went through my stash of craft supplies and found some black card stock that I thought would work and decided that I would write inside with my silver paint pen. But first… I thought they could use a bit of added cuteness so I got out my sewing machine…


…and stitched across the top of each card with red thread. I think it gave them just the right finishing touch.  The office supply envelopes I bought had a faint logo printed on the inside so I designed a little Hello label to hide it... 


I think this year's cards are even cuter than last year's.
Do you make your own cards?

lisa
[freebie via onevelvetmorning.wordpress.com]