.

Showing posts with label decor. Show all posts

[ a tad british ]

WITH ALL THE reports of cancelled flights in London over the past few days, Britain is definitely in the news. I'm grateful that my guy avoided it by a day and made it here for the holidays!

The Union Jack has been popping up everywhere and if you love those British touches in decor as much as I do, here's some eye candy for you - I particularly like the various subtle ones.

lisa


[livingetc; housetohome; idealhome; apartmenttherapy;
flickr; livingetc; homes&gardens; little emma english home;
idealhome; homes&gardens; idealhome; rue mag; tiina blog;
housebeautiful; housetohome]

[ totally wired ]

WITH ALL THE hustle and bustle around here with gifts and wrapping and card writing, I need to reorganize a bit (ok, more than a bit - it's a disaster!). I've always been fond of wire baskets and I love how every one of these little office spaces incorporates wire baskets. Much more charming than those cheap plastic office organizers!


Cute wire baskets aren't always easy to find so if you want to try your hand at transforming an old freezer organizing basket from white plastic-coated to something a bit more chic, you have to see what Tina did at Rubies' Place!

lisa


[1, 3, 4 little emma english home; country homes & interiors; cath kidston; rubies' place]

[ pretty gritty ]

EVER THOUGHT you can't mix industrial with girly? How about this?


A coffee table made from a simple palette and big castors somehow feels right at home with the girly settee and pink touches in cushions and blooms. What do you think? Would you go for this mix?

lisa
[via little emma english home]

[ turning everyday into holiday ]

ONE OF MY favourite ways to decorate for Christmas is to give the everyday a festive feel. And this home does just that.

By simply combining fresh chartreuse patterned bedding with a couple of raspberry pillows, and hanging up a simple boxwood wreath, a holiday feeling is implied without a Santa in sight. Remove the wreath after the holidays and in a flash, the holidays are over.


Gifts wrapped in simple chartreuse paper with the addition of red toile bands, feel festive even though there's nothing distinctively Christmas about them.


And this tablescape feels festive, even though no holiday-motif patterns are used. Again a simple boxwood wreath and Christmas tree add the holiday feel, but come January, ditch the tree and the wreath and this tablescape would work any time of year.


How do you decorate for the holidays? Simple festive touches to the everyday or all-out Santa theme?

lisa
[style at home]

[ wooden you love this? ]

WITH ALL THE snow we've been getting lately, I can't help but think of warm, cozy spaces and to me, nothing says cozy like the use of wood - rustic, natural, weathered or stained.

Our place has quite a pale colour scheme, but our ceilings are all tongue and groove pine and as much as I disliked all the pine when we first moved in, I'm actually kinda liking the wood up there now (ssshhhh.. don't tell my guy that!). I think having painted all the trim and the kitchen cabinets (post on that still to come), it cut down on the amount of wood which is now making me appreciate the ceiling all the more. So whether your look is Hamptons cottage or Vermont cabin, here are some other spaces that ooze cozy...

lisa


[me and alice; 2, 8 elle decor; 3, 7 chic coles; 4, 9 mairie claire maison; 
better homes and gardens; sarah richardson] 

And thanks to Meeling over at The Hairy Peach for presenting me with the Stylish Blogger Award! I'm tickled pink! :)

[ a little cottage charm ]


DON'T YOU just love the simplicity of this kitchen? The white beadboard walls and ceiling add texture, the plate rack adds charm and the old window and pie cupboard create a pretty vignette. I love the rustic pot hook on the end of the island for those everyday necessities. I'm guessing there's an entire wall of appliances and the sink which allows for the big island for prepping. Definitely something I'll bookmark for my future beach cottage {I can dream!}

lisa
[via lilla blanka]

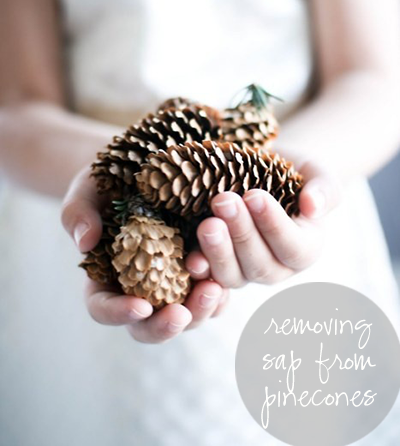
[ removing sap from pinecones ]

IT'S THAT time of year when pinecones take centre stage in holiday decorating. Buying pinecones can be expensive but if you're lucky enough to live somewhere where you can gather them on a walk near the woods, you can easily prepare them for crafting. I had some that I brought back from Canada since finding them in Dubai isn't an easy thing.

But first: remove the sap…


There are a couple of ways you can remove the sticky sap from pinecones: washing them or baking them. I decided to bake them since I figured it would be quicker and much less messy. It worked like a charm.

Line a baking sheet with foil and lay out the pinecones…


Bake in a 200F oven for about 30 minutes or so. Check on them every so often to make sure they're doing ok. Turn them if you like. The sap will drip off onto the foil as the pinecones dry and open up. Your whole house will smell like pine trees while they bake…


Remove from oven and lift them from the foil. Notice how they've opened up and the melted sap has created a lovely hard shine on the tips…


Now they're ready for your decor either au natural or you can add paint or glitter…


Are you decorating with pinecones this Christmas? 

lisa
[first pic: via marloes oosterhuis; remaining: mine]

[ homemade chalk paint console makeover ]

REMEMBER THIS console we shipped here from Muskoka?


Well, I've been meaning to give it a facelift for a while now and was really excited to hear about Annie Sloan's Chalk Paint {partly because the results are always so pretty, and because you don't need to sand or prime first - I'm lazy}.

Well, my excitement fizzled when I discovered that no one in Dubai carries it and no one will ship it to me here either. :(

Plan B: homemade chalk paint


I stumbled upon a couple of suggestions on how to make your own so I thought I'd give it a try.

I had some pretty Duck Egg paint from Laura Ashley and decided to use that {eggshell finish} 1/2 cup and mixed it with 1 tbsp of Plaster of Paris.


The best part is chalk paint requires no prep ~  just start painting.


I chose to do 2 coats. The paint dries fairly quickly.


Once the second coat had dried for a couple of hours, I distressed the edges a bit with some coarse sandpaper.


I wiped it clean to remove all sanding dust and then it was time to wax.

I chose Lundmark Clear Paste Wax. Why? Because that's all I could find in Dubai. I was hoping it would be as lovely and soft to work with as Annie Sloan's Wax is supposed to be.


This wax was awesome! I applied it with an old cotton sport sock on my hand and it went on smoothly in a nice thin coat. After about 10 minutes of drying time, I buffed it with a clean sock.


Some new knobs to add some sparkle.


All done! Can you see the lovely sheen the wax gave it?


You can add a coat of a brown wax over top if you want to add a bit more age. Since I couldn't find anything other than my clear wax, I left it as is.


I'm so pleased with how it turned out. The homemade chalk paint worked like a charm and was so cheap. My favourite part was the waxing - it was quick and it gave the perfect sheen.

Now what else can I paint?

lisa